
How To Inlay Mother Of Pearl: Create Your Own Luminous Decorative Piece!
Mother of pearl is a classic material, highly durable and equally elegant, that has been used by artisans in a range of decorative projects for millennia. The mother-of-pearl inlay technique used to create luminous furnishings has been loved by most because of its timeless beauty.
Want to create your own lustrous decorative piece with a touch of this polished material?
Here’s a guide on how to inlay mother of pearl. In this guide, wood is used as the material where the inlay is to be done. You will follow a series of steps like preparing the inlay, layout, scribing, and routing of the wood, inserting the inlay, and giving it a finishing touch.
Let’s take a look!
How To Inlay The Mother of Pearl Into Wood

It’s better to start by saying that mother-of-pearl inlay is simpler on wood with a flat surface, so if it’s your first time, it’s better to go for a surface that is smoothly leveled. Now, let’s take a look at how to inlay the mother of pearl; here a wooden surface is used as the material.
Preparing the mother-of-pearl
At the first stage, you need to prepare the mother of pearl first to move forward.
Precut inlay/crushed mother of pearl
You can purchase precut inlays from the store or crushed mother of pearl which you can use to fill in the spaces of the material where the inlay is to be done. Starting with a precut inlay will boost your chances of getting a beautiful result, especially if you’re inlaying a traditional design.
If you have a circular piece of wood or a project where gravity kind of works against you, you might want to create a paste using some epoxy or crushed mother-of-pearl. Cutting peal shell for that kind of structure is a little tiresome and difficult.
Mother-of-pearl sheets
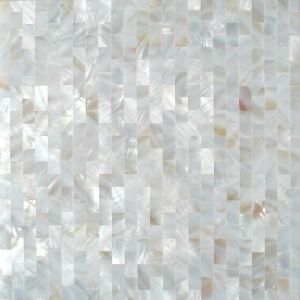
You can also buy a mother-of-pearl sheet or shell and then cut the design yourself.
First, create a paper sketch design. If it’s a little complicated, make several individual parts of the pattern. Now glue them to the surface of the sheet or shell to produce an accurate design. Or, you can draw the individual design on the shell itself.
Now, you can start sawing the pearl sheet. Make absolutely sure you are wearing a respirator or a quality dust mask before you begin sawing since shell dust is particularly hazardous and abrasive.
The shell must first have a hole drilled into it for the fret saw to be introduced before you can start cutting. Carefully maneuver the saw up and down against the shell while cutting the design. After that, hand-sand each piece against a big grinding machine to remove the saw-cut edges that are rough.
If you need to remove the middle of a piece in the shape O, drill a hole in the middle, insert the saw blade, and fasten the blade to the saw frame. After cutting all the way through the radius of the piece, unthread the blade and start working on the outside line.
That’s it. Start assembling the cutouts once you have them all organized. You can use CA glue to assemble the pieces.
Scribing the layout on the wood
Now neatly arrange the pearl design onto the surface of the wood you are to inlay. To temporarily hold the parts together so you can precisely sketch their curves on the wood, use water-based glue. Scribe all around the design using the X-Acto knife. Make sure to scribe all surrounding areas and within enclosed loops. This will provide you with a clear route to follow when routing.
When you’re finished, carefully remove the mother-of-pearl pieces, taking care to do so without damaging or cracking them.
Routing the pearl design in the wood surface
Once the wood surface has been well cleaned and is free of all the adhesives, you can now begin cutting out the mortise in which the inlays will seat. Cleaning is important for you to see the line that has been scribed on the surface well. Remember to route the dip or groove that is a little bit shallower than the chosen shell thickness.
Using a wood router, Dremel or other rotary tool is the only method of routing out the design that is actually rational. This task used to be done with small chisels and sharp scribes previously, but in this method, the outcomes are not that satisfying. To precisely regulate the shallowness of the grooves, the micro-adjustments of rotary tools like Dremel help a lot.
Placing the pearl inlays
Now it’s time to neatly glue the pieces into the designated slots. You can use a little glue to hold them in place, let them dry, and then fill in the gaps later with more glue.
Fine sawdust can also be used as filler underneath the design to fill in any voids left by the imperfections in the pearl. In order to match the color of the wood precisely, some inlay professionals use epoxy combined with dust as both the glue and filler.
Leveling the inlay
This is the final step. After your preferred glue has properly set, you may start leveling any extra adhesive and elevated shell surfaces with a succession of sandpaper until they are clean and level.
To remove the excess adhesive and hardened dust, start with 180-grit sandpaper. Then use the 240 grit to remove excess inlay material, and finally polish it with 320 grit.
Once leveling is complete, you can now apply the top coat of your preference to complete your inlay project.
Final Thoughts
Hope you have got an idea of how to inlay mother of pearl, and you’ll be motivated to design your own inlaid piece. Before ending, here is some piece of advice for you.
Adhesives with a wet appearance bring out the maximum color in the priceless shell as though it were wet in its natural habitat. So, if at all possible, use those adhesives. Also, prepare yourself with all the necessary safety gear before cutting the inlay and during routing the pearl design on the material.
Good luck with your inlaying!